[:en]
Part 2 – Create the world with Box2D
Instroduction
Here the second tutorial to learn how to create a physic based game like Angry Birds in Flash.
You can download the complete sources here: How_to_create_a_game_like_angry_birds_part2.zip
If you missed the first tutorial you can find it here: https://benoitfreslon.com/fr/tutorial-how-to-create-a-game-like-angry-birds-with-box2d-world-construction-kit-flash-part-1
In this tutorial I will show you how to create an object like an indestructible metal board.
We will use this object in a simple level with a simple structure.
Stage modification
From the Properties pannel, modify the width of the stage to 800px.

Floor creation
Let’s start to create the floor MovieClip.
Insert > New Symbol > Name: Floor > Type: MovieClip > Export for ActionScript > Class: Floor > Base Class: shapes.Box > OK

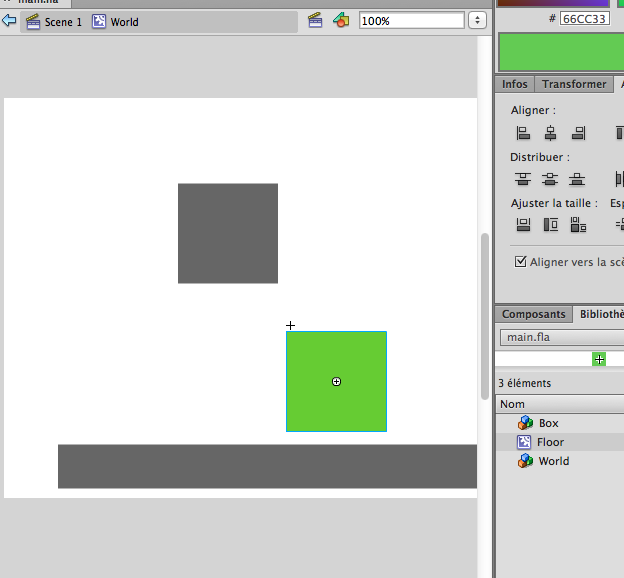
Now draw a simple green square.

NB: The World Construction Kit engine always uses the center of the object as a gravity center.
Always center the shape with the Align pannel:

Now click on the « Scene 1 » to go back on the main stage then double click on the World MovieClip to get inside.
You must construct your level into the World MoieClip only.
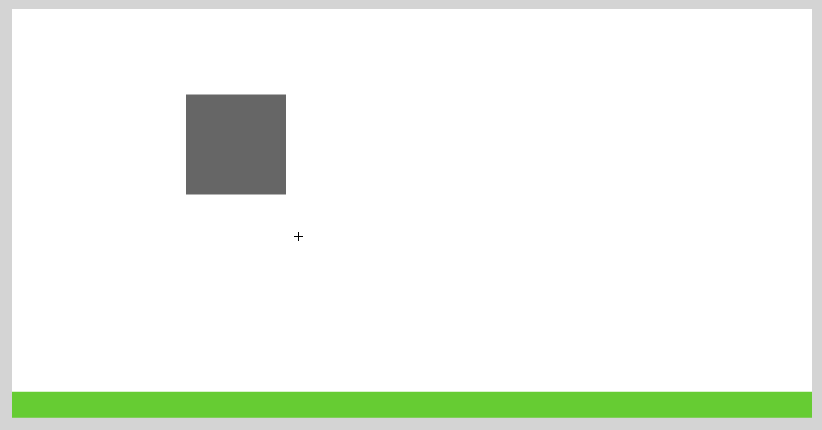
From your library drag and drop an instance of Floor in the stage:
Then scale the floor box to make a beautiful floor with the Free tool transform from the toolbar on the left.
Delete the old grey floor and use the new one. Place the floor in the bottom like this:
To set all physic parameters you have 2 solutions. By using ActionScript code (later) or using the Flash component properties.
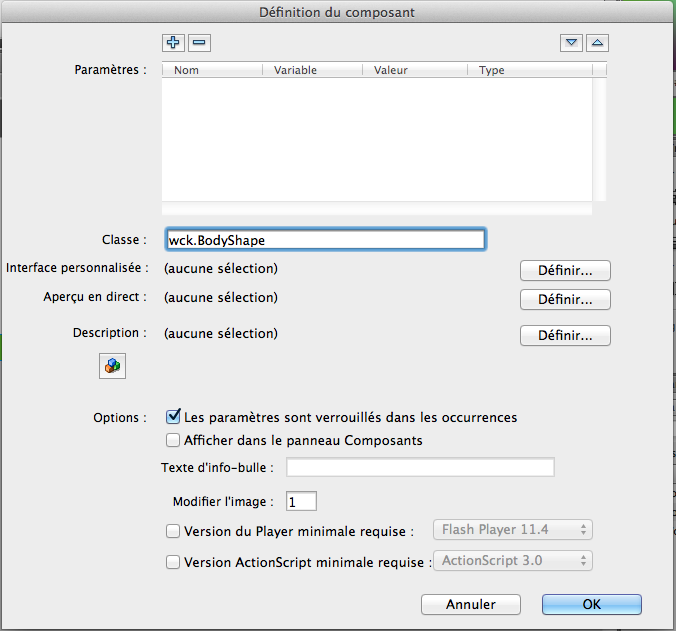
Let’s define a Flash component on the Floor object.
From the library > Select the Floor MovieClip > Right click > Define component
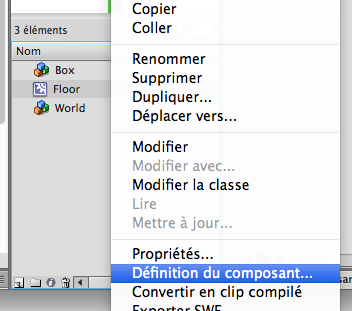
Class: wck.BodyShape > OK.
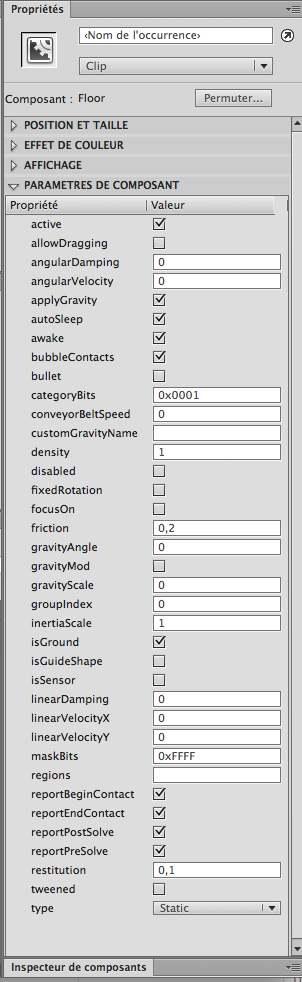
Now you can see the component properties if you click on the Floor instance in the stage. Look at the component parameters in the properties pannel.
Use this settings:
Create a dynamic board
We will create an iron board.
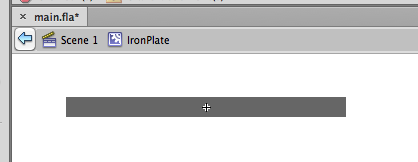
Insert > New Symbol > Name: IronPlate > Type: MovieClip > Export for ActionScript > Class: IronPlate > Base class: shapes.Box > OK

Draw a grey board: width:200px and height: 10px. Then center the shape like this:
We will set the same settings to all boards in the game with only one class.
We this method you can win a lot of time and you don’t have to set one by one. Otherwise it’s pain in the ass.
That’s why we have to create the IronPlate class.
File > New > AcitonScript 3.0 Class > Class name: IronPlate > OK

Then > File > Save as > IronPlate.as (in the same folder as the .fla folder).

Copy and paste this code in the IronPlate.as file to define a generic behavior for all metal boards.
package  {

	import shapes.Box

	public class IronPlate extends Box {

		public function IronPlate() {
			// constructor code
		}
		override public function create():void {
			super.create();
			//trace("iron plate created");
			this.type = "Dynamic";
			this.friction = 0.2;
			this.density = 1;
			this.restitution = 0;
			this.isGround = true;
			this.allowDragging = false;
			this.reportBeginContact = true;
			this.reportEndContact = true;
			this.reportPostSolve = true;
			this.reportPreSolve = true;

		}
	}

}
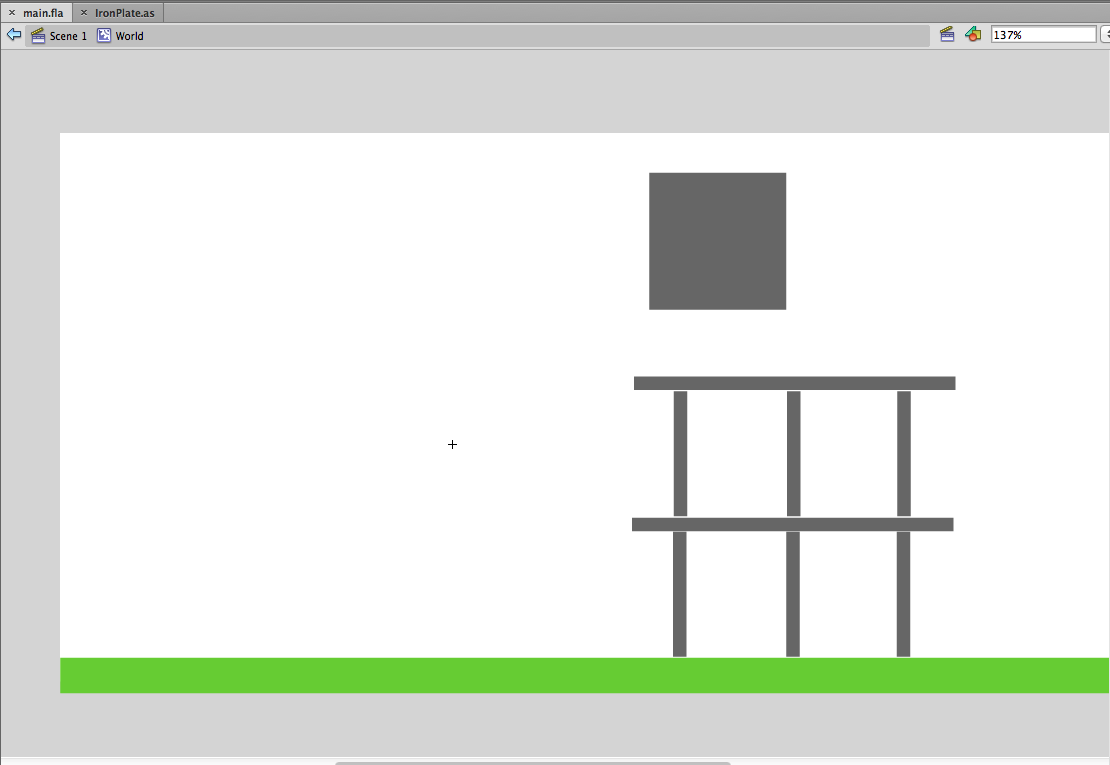
Finally add several IronPlate instances into the World MovieClip on the stage.
Build a simple structure like this to test the game. I reuse the grey box to destroy my test structure.
Test the animation > CTRL + Enter
[swf:https://benoitfreslon.com/wp-content/uploads/2013/04/main.swf 400 250]
If you have several mistakes or if the boards are static check if IronPlates MovieClip are in the Wolrd MovieClip.
Scene > World > IronPlates
See you ![:fr]
Partie 2 – Creation du niveau avec Box2D
Introduction
Voici la suite du tutoriel sur la création d’un jeu de physique comme Angry Birds en Flash.
Vous pouvez télécharger les sources ici : How_to_create_a_game_like_angry_birds_part2.zip
Si vous avez raté la première étape indispensable du tutoriel elle est ici : https://benoitfreslon.com/fr/tutorial-how-to-create-a-game-like-angry-birds-with-box2d-world-construction-kit-flash-part-1.
Introduction
Dans ce tutoriel je vais vous montrer comment créer un objet de type : plaque rigide et indestructible.
Nous allons ensuite l’utiliser dans un niveau simple pour construire une structure de base.
Modification de la scène
Depuis le panneau Propriétés, modifier la taille de la scène pour 800px de large.
Création du sol
Commençons par créer le MovieClip du sol.
Insertion > Nouveau Symbole > Nom : Floor > Type : Clip > Exporter pour ActionScript > Classe : Floor > Classe de Base : shapes.Box > OK
Une fois dans le clip créé, dessiner un carré vert.
NB : Le moteur World Construction Kit utilise toujours le centre de l’image comme étant le centre de gravité d’une forme physique.
Donc toujours centrer la forme au centre du symbole à l’aide du panneau Aligner :
Une fois le sol terminé cliquer sur Scène 1 pour revenir sur la scène puis rentrer dans le Clip World.
C’est seulement dans le Clip World que nous allons construire le monde physique.
Depuis la bibliothèque cliquer et déposer une instance de Floor sur la scène comme ceci :
Ensuite déformer la forme du sol avec l’outil de transformation libre dans la barre d’outils à gauche.
Supprimer l’ancien sol gris pour le remplacer par le nouveau. Placer le sol en bas de l’écran de cette façon.
Pour régler tous les paramètres physiques du sol il a 2 façons. Soit via le code ActionScript (nous verrons cela plus tard) soit avec les propriétés du composant Flash.
Pour avoir accès à toutes ces propriétés via Flash il faut définir un composant sur l’objet Floor fraîchement créé.
Depuis la bibliothèque > sélectionner le clip Floor puis > clic droit > Définition du composant.
Classe : wck.BodyShape > OK.
Désormais lorsqu’on clic sur le clip Floor placé sur la scène on a accès aux propriétés physiques depuis les paramètres du composant dans dans le panneau propriétés.
Régler de cette façon pour le moment:
Création de plateformes dynamiques
Nous allons maintenant créer les plateformes dynamiques.
Insertion > Nouveau symbole > Nom : IronPlate > Type : Clip > Exporter pour ActionScript > Classe : IronPlate > Classe de base : shapes.Box > OK
Dessinez une plaque de métal environ 200 px de large et 10 px de hauteur et centrez l’image.
Nous allons donner les mêmes réglages à toutes les plaques disposées dans le jeu avec une seule classe.
Cela nous évitera de régler TOUS les objets un par un via Flash. Une tâche pénible. Voilà pourquoi nous allons créer une classe IronPlate.
Fichier > Nouveau > Classe d’ActionScript 3.0 > Nom de classe : IronPlate > OK
Ensuite > Fichier > Enregistrer Sous > IronPlate.as ( Dans le même dossier que le fichier .fla ).
Copier coller ensuite ce code afin de donner un réglage générique pour toutes les plaques en métal.
package  {

	import shapes.Box

	public class IronPlate extends Box {

		public function IronPlate() {
			// constructor code
		}
		override public function create():void {
			super.create();
			//trace("iron plate created");
			this.type = "Dynamic";
			this.friction = 0.2;
			this.density = 1;
			this.restitution = 0;
			this.isGround = true;
			this.allowDragging = false;
			this.reportBeginContact = true;
			this.reportEndContact = true;
			this.reportPostSolve = true;
			this.reportPreSolve = true;

		}
	}

}
Enfin ajouter plusieurs instances de IronPlate dans le Clip World qui se trouve sur la scène.
Construire une structure dans le genre pour tester le bon fonctionnement du jeu.
J’ai placé la grosse boite au dessus pour casser la structure.
Tester l’animation > CTRL + Entrée
[swf:https://benoitfreslon.com/wp-content/uploads/2013/04/main.swf width:400 height:250]
Si il a des erreurs ou des plaques immobiles vérifier que les Clip IronPlates sont bien dans le clip World.
Scène > World > IronPlates
A bientôt :).
[:]
